
Successful Data Verification with Layout Templates
Easily design your desired product using a layout template. Vispronet provides a suitable layout template for download for each individually printable item. This template helps you correctly create your print data in graphic programs such as Adobe Illustrator, InDesign, or CorelDRAW. Here you will learn what to pay attention to.
Download Layout Template
After completing your order, simply download the template from our website under My Account Data Upload . Please select the order number and the position. Additionally, the layout templates corresponding to your configuration are available on each product detail page.
Structure of the Template
- Page 1: all important specifications for an optimal print result, as well as a product sketch with design instructions
- Page 2: dimensionally accurate template for creating your design in a graphic program. Place the elements according to the marked areas
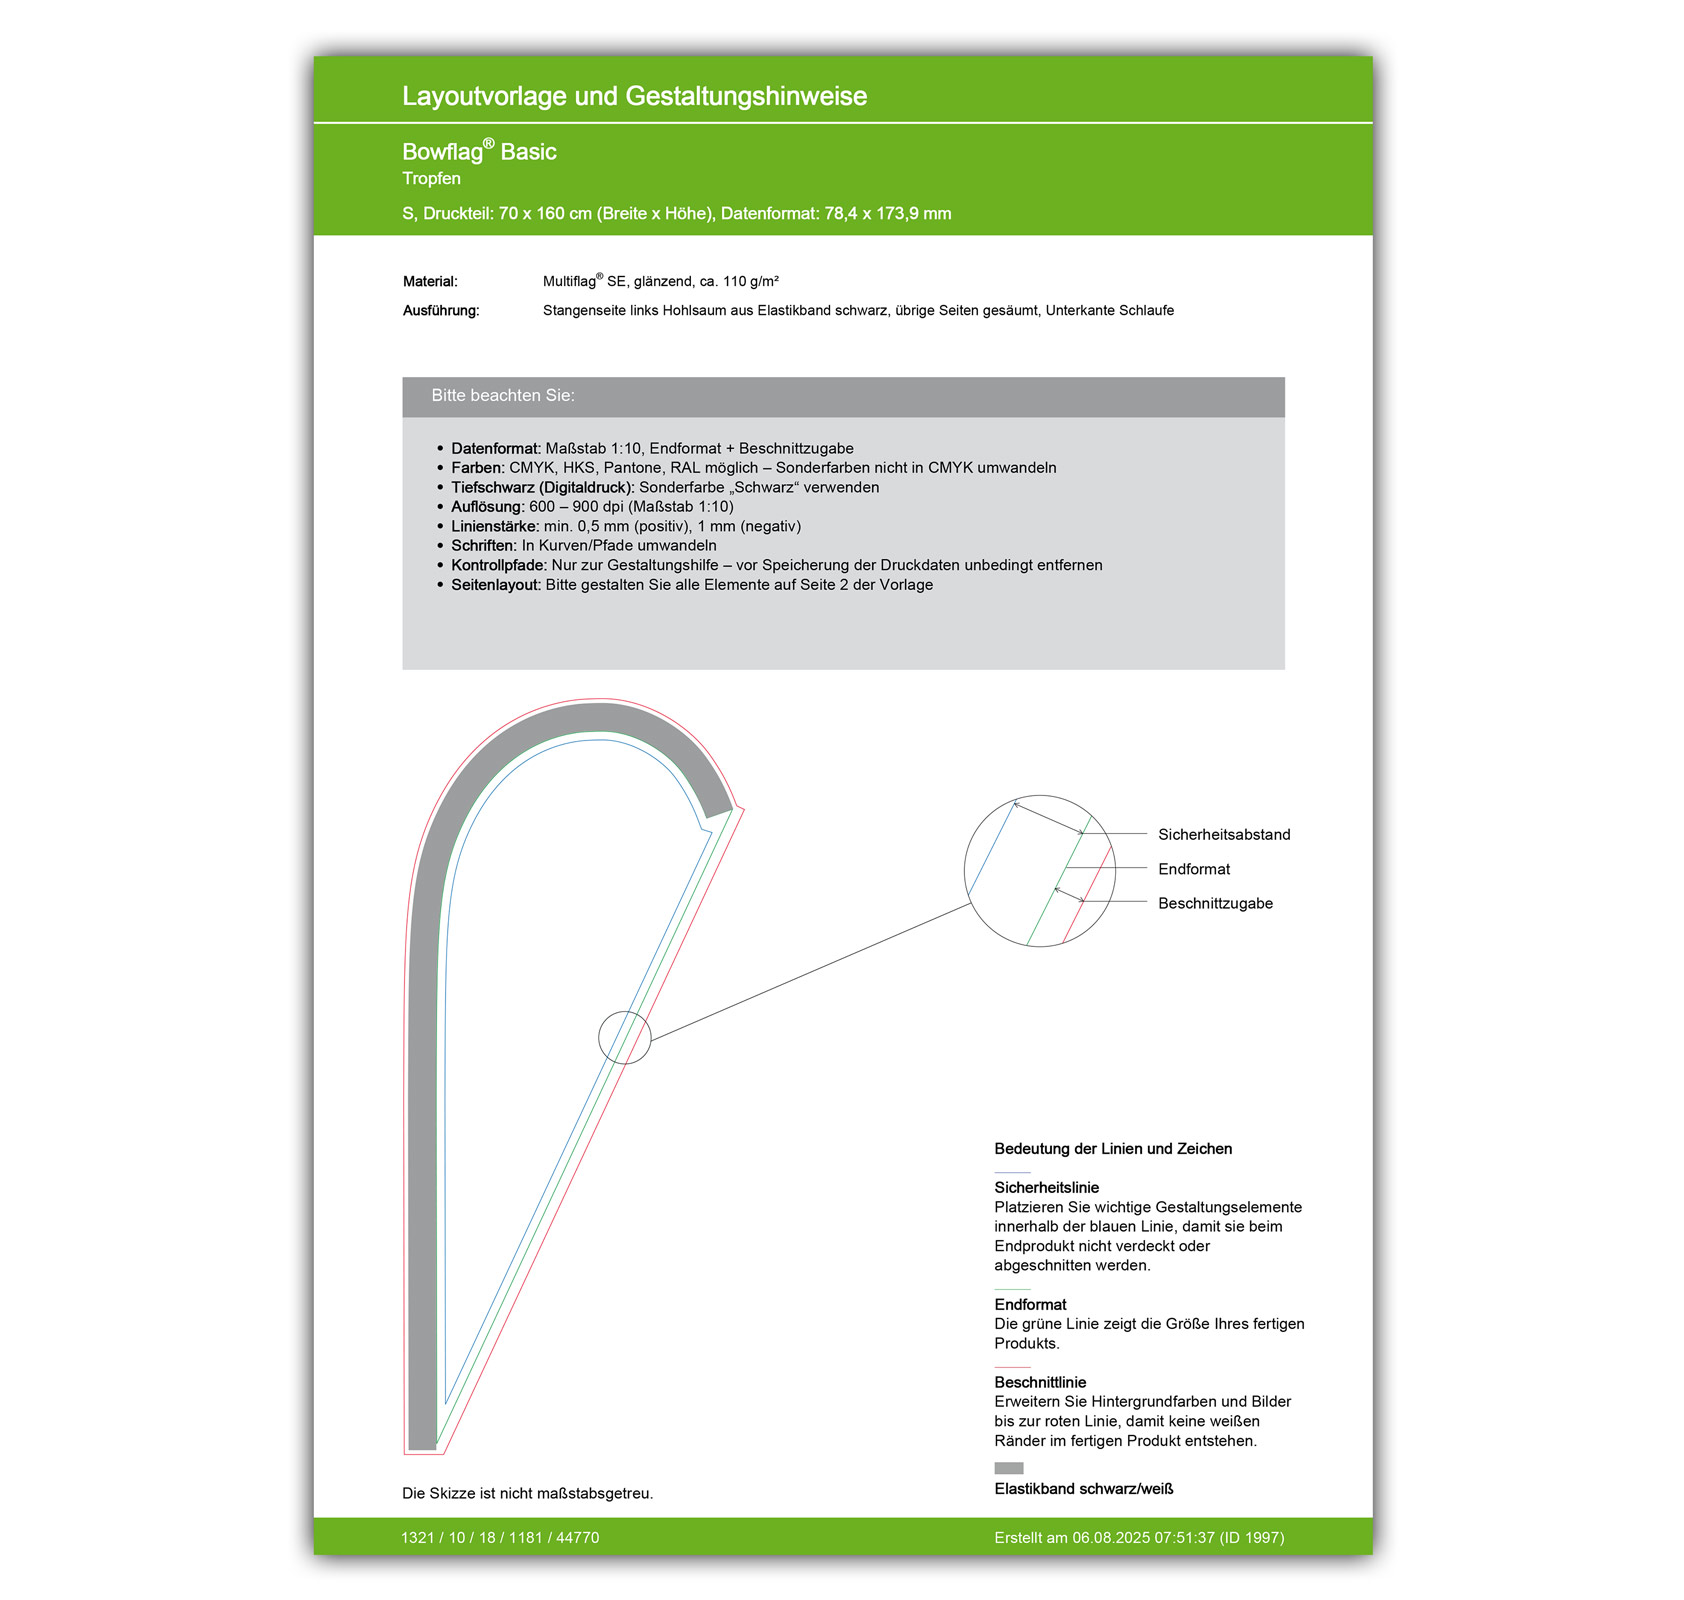
In the upper section, you will find relevant information about your selected product, such as size, material, and execution.
The specified data format refers to page 2 of the template and forms the basis for error-free data verification.
Important Specifications for a Perfect Print Result
Data Format
Use the layout template without altering the print data format specified above. This should exactly correspond to the design area in your graphic program and is created at a scale of 1:1 for small products or 1:10 for larger products.
Colors
- Color Mode & Color Profile: Ideally, create your data in CMYK mode with the ISO Coated v2 color profile. We also accept any other color profile. If you send us RGB data, it will be automatically converted to CMYK before the production process. However, due to the different color spaces, deviations in color reproduction may occur.
- Spot Colors: Additional spot colors provide increased color fidelity for corporate identity or other important design elements. Use the color palettes from HKS, Pantone oder RAL und legen Sie additional spot color channels in your file. For an especially intense deep black, please create a separate color channel labeled “Black.”
Resolution
The print quality of photos and halftone effects fundamentally depends on sufficient image resolution. The specifications for the ideal image resolution of your selected product are matched to the scale of the template. Templates at a 1:10 scale therefore require a higher resolution than templates at a 1:1 scale, as the graphic will be scaled to the original product size before the printing process.
Line Thickness
For optimal print results of small details, please observe the specified minimum line thicknesses. The values refer to the original size of your product and are indicated as “positive” for dark details on a light background and “negative” for light contours on a dark background. This ensures that texts and QR codes remain legible at all times.
Fonts
For correct display, always convert fonts to curves or outlines or embed the fonts completely in your PDF.
Control Paths
The colored lines facilitate easy design and show exactly which areas should be used for important elements and which are intended for bleed and further processing. It is best to use the lines as orientation on a separate layer, which you delete before saving.
- – green line = final format
Indicates the final format of the ordered product after completion. - – red line = bleed line
Depending on the selected variant, allowances for bleed, edge reinforcements, or finishing, for hollow or welded seams are required for product manufacturing. Even if these areas are not visible later, they must always be filled with background color and/or image material. This prevents unwanted edges and white borders on the finished product. - – blue line = safety line
Place all important elements such as texts, logos, or crests within this marking. This prevents elements from being partially covered or cut off by seams or bleed. - – black lines = markings
Black lines mark where edges, division seams, zippers, or other details are located. The specific designation is listed in the legend. - → black arrows & • grey circles and stripes
These symbols indicate the position of carabiners, as well as eyelets, drill holes, or punch holes and can be taken into account when designing the print data.
Never convert the colors of the control paths to CMYK, as they would then no longer be recognized by the automatic data verification and could be accidentally printed.
With our step-by-step guide to print data creation, you can easily design your desired product.


